Main Page: Difference between revisions
| (56 intermediate revisions by the same user not shown) | |||
| Line 156: | Line 156: | ||
{{ttuto | {{ttuto | ||
|label=Startup | |label=Startup scripts | ||
|descr=What are main.py and boot.py | |descr=What are main.py and boot.py | ||
|img=tlogo-micropython-main.jpg | |img=tlogo-micropython-main.jpg | ||
| Line 163: | Line 163: | ||
{{ttuto-end}} | {{ttuto-end}} | ||
== Programming First-step == | == Programming First-step == | ||
| Line 185: | Line 179: | ||
|img=tlogo-input-output.jpg | |img=tlogo-input-output.jpg | ||
|link=Pymate-Input-Output | |link=Pymate-Input-Output | ||
}} | }} | ||
| Line 198: | Line 191: | ||
|label=User button | |label=User button | ||
|descr=Managing user button in code | |descr=Managing user button in code | ||
|img=tlogo-user-button. | |img=tlogo-user-button.png | ||
|link=Pymate-User-Button | |link=Pymate-User-Button | ||
}} | }} | ||
| Line 205: | Line 198: | ||
|label=User LEDs | |label=User LEDs | ||
|descr=Managing user LEDs with code | |descr=Managing user LEDs with code | ||
|img=tlogo-user-leds. | |img=tlogo-user-leds.png | ||
|link=Pymate-User-LEDs | |link=Pymate-User-LEDs | ||
}} | }} | ||
| Line 211: | Line 204: | ||
{{ttuto | {{ttuto | ||
|label=RealTime Clock | |label=RealTime Clock | ||
|descr= | |descr=Geting an accurate date and time | ||
|img=tlogo-rtc. | |img=tlogo-rtc.png | ||
|link=Pymate-RealTime-Clock | |link=Pymate-RealTime-Clock | ||
}} | }} | ||
| Line 219: | Line 212: | ||
|label=Cycle timing | |label=Cycle timing | ||
|descr=Measuring mainloop execution time | |descr=Measuring mainloop execution time | ||
|img=tlogo-cycle-timing. | |img=tlogo-cycle-timing.png | ||
|link=Pymate-cycle-timing | |link=Pymate-cycle-timing | ||
}} | }} | ||
{{ttuto | {{ttuto | ||
|label=16ADI16DO | |label=16ADI16DO Tour | ||
|descr=Tour of the PymateIO 16 Analog-DataIn and 16 DataOut board. | |||
|img=tlogo-16adi16do.jpg | |||
|link=Pymate-16ADI16DO-Tour | |||
}} | |||
{{ttuto | |||
|label=16ADI16DO Usage | |||
|descr=Using the 16ADI16DO expansion with PymateIO | |descr=Using the 16ADI16DO expansion with PymateIO | ||
|img=tlogo- | |img=tlogo-16adi16do.jpg | ||
|link=Pymate- | |link=Pymate-16ADI16DO-introduction | ||
}} | |||
{{ttuto | |||
|label=RS485 Basics | |||
|descr=Accessing directly the RS485 bus to read/write sensors | |||
|img=tlogo-RS485.png | |||
|link=Pymate-RS485-basic | |||
}} | |||
{{ttuto | |||
|label=Modbus | |||
|descr=Using Modbus RTU over RS485. Use PymateIO as Modbus Master. Example with Wind Dir., Power Meter, Temp/Humidity/Lux meter. | |||
|img=tlogo-modbus.png | |||
|link=Pymate-Modbus-basic | |||
}} | }} | ||
| Line 233: | Line 247: | ||
== Common use-cases == | == Common use-cases == | ||
{{ | |||
{{ttuto-begin}} | |||
{{ttuto | |||
|label=Remote Control | |||
|descr=Click once to power it on. Click again to power it off. | |||
|img=tlogo-usecases.png | |||
|link=PymateIO-remote-control | |||
}} | |||
{{ttuto | |||
|label=Time Relay | |||
|descr=Click to power/light-up for a given amount of time. | |||
|img=tlogo-usecases.png | |||
|link=PymateIO-time-relay | |||
}} | |||
{{ttuto | |||
|label=Delaying in code | |||
|descr=Learn how to implement a '''no blocking delay''' within your loop. Using DS18B20 with '''OneWire''' protocol to demonstrate the behavior. | |||
|img=tlogo-usecases.png | |||
|link=PymateIO-Delaying | |||
}} | |||
{{ttuto | |||
|label=Hysteresis | |||
|descr=Hysteresis management in running process. Discover the HeaterHis and CoolerHis controller class. | |||
|img=tlogo-usecases.png | |||
|link=PymateIO-hysteresis | |||
}} | |||
{{ttuto | |||
|label=Value Mapping | |||
|descr=Great Trick to save time and coding | |||
|img=tlogo-usecases.png | |||
|link=PymateIO-mapping | |||
}} | |||
{{ttuto | |||
|label=PID Regulation | |||
|descr=Running the software PID controller included within Pymate | |||
|img=tlogo-usecases.png | |||
|link=PymateIO-PID-controler | |||
}} | |||
{{ttuto | |||
|label=LED Tuning | |||
|descr=LED can do so much more than being on or off.<br />HeartBeat, Pulsing, ErrorCode and more can be so useful. | |||
|img=tlogo-usecases.png | |||
|link=PymateIO-LED-Tuning | |||
|traduction=1 | |||
}} | |||
{{ttuto | |||
|label=Interrupt Request | |||
|descr=Being quickly warned of an event! | |||
|img=tlogo-usecases.png | |||
|link=PymateIO-IRQ | |||
|traduction=1 | |||
}} | |||
{{ttuto | |||
|label=Watchdog | |||
|descr=Re-inforce Cycle Time with WatchDog | |||
|img=tlogo-usecases.png | |||
|link=PymateIO-watchdog | |||
|traduction=1 | |||
}} | |||
{{ttuto | |||
|label=Data Logging | |||
|descr=Permanent storage of history, sensor data, etc | |||
|img=tlogo-usecases.png | |||
|link=PymateIO-data-logging | |||
|traduction=1 | |||
}} | |||
{{ttuto | |||
|label=HMI Display | |||
|descr=Setup the HMI display and create the Pymate script accordingly. | |||
|img=tlogo-hmi-display.png | |||
|link=PymateIO-HMI | |||
}} | |||
{{ttuto | |||
|label=HMI Display | |||
|descr=A second example with numeric input on the HMI display | |||
|img=tlogo-hmi-display.png | |||
|link=PymateIO-HMI-numeric-input | |||
}} | |||
{{ttuto-end}} | |||
== Mini projects == | == Mini projects == | ||
| Line 248: | Line 345: | ||
* Tank refill | * Tank refill | ||
== Expansion programming == | == Pymate Expansion programming == | ||
{{ | {{ttuto-begin}} | ||
{{ttuto | |||
|label=Board_ID | |||
|descr=Identification of expansion board | |||
|img=tlogo-board-id.png | |||
|link=PymateIO-about-board_id | |||
}} | |||
{{ttuto | |||
|label=CAN Scan | |||
|descr=Scanning the CAN bus for boards and check for CAN error. | |||
|img=tlogo-can-scan.png | |||
|link=PymateIO-CAN-Scan | |||
}} | |||
{{ttuto | |||
|label=Programming | |||
|descr=How to control your 16ADI/16DO expansion. Input/Output/Analog/etc. | |||
|img=tlogo-can-scan.png | |||
|link=PymateIO-16ADI16DO programming | |||
|traduction=1 | |||
}} | |||
{{ttuto | |||
|label=Change Board_ID | |||
|descr=How to change the 16ADI16DO board identification on the CAN bus. | |||
|img=tlogo-board-id.png | |||
|link=Pymate-16ADI16DO-Tour#Configuration_procedure | |||
}} | |||
{{ttuto-end}} | |||
== PymateIO Expansion Bus == | |||
{{ttuto-begin}} | |||
{{ttuto | |||
|label=Connector | |||
|descr=Pymate.IO Expansion connector in details | |||
|img=tlogo-pymate-expansion-connector.png | |||
|link=PymateIO-Expansion-Connector | |||
}} | |||
{{ttuto | |||
|label=I2C Bus | |||
|descr=Accessing I2C bus | |||
|img=tlogo-pymate-i2c.png | |||
|link=PymateIO-I2C-Bus | |||
}} | |||
{{ttuto | |||
|label=SPI Bus | |||
|descr=Identification of expansion board | |||
|img=tlogo-pymate-spi.png | |||
|link=PymateIO-SPI-Bus | |||
|traduction=1 | |||
}} | |||
{{ttuto | |||
|label=CAN Bus | |||
|descr=Accessing CAN | |||
|img=tlogo-pymate-can.png | |||
|link=PymateIO-CAN-bus | |||
|traduction=11 | |||
}} | |||
{{ttuto | |||
|label=OneWire | |||
|descr=Using OneWire protocol on the Pymate Expansion (part of another turotial). | |||
|img=tlogo-one-wire.png | |||
|link=PymateIO-Delaying#Wiring_DS18B20 | |||
}} | |||
{{ttuto-end}} | |||
== Advanced programming == | == Advanced programming == | ||
| Line 262: | Line 427: | ||
* Creating tasks | * Creating tasks | ||
* Scheduling tasks | * Scheduling tasks | ||
== References == | == References == | ||
Latest revision as of 00:41, 12 September 2026
About PymateIO

|
PymateIO is an affordable Industrial Controler (PLC) Powered with MicroPython. |
PymateIO EcoSystem
PymateIO is expandable by design starting with few board, new arrivals should come with time.
Key products

|
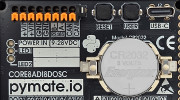
PymateIO Core Core8ADI8DOSC
|

|
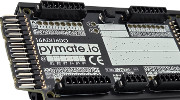
PymateIO 16ADI16DO expansion
|

|
CommandHMI [COMING SOON]
|
Product Nomenclature
| Letter | Feature |
|---|---|
| DI | Digital Input. It is prefixed with the number of input (ex : 8DI or 8ADI).
May be in combination with A. |
| A | Analog Input. It is prefixed with the number of analog input (ex : 8A or 8ADI).
May be in combination with DI. |
| DO | Digital Output. It is prefixed with the number of analog output. |
| S | Serial (RS485, MODBUS RTU) |
| C | CAN bus |
| P | SPI bus |
| I | I2C bus |
| U | UART |
| T | Modbus TCP |
Products tour
Programming HowTo



Programming First-step





Using Modbus RTU over RS485. Use PymateIO as Modbus Master. Example with Wind Dir., Power Meter, Temp/Humidity/Lux meter.
Common use-cases

Learn how to implement a no blocking delay within your loop. Using DS18B20 with OneWire protocol to demonstrate the behavior.
Hysteresis management in running process. Discover the HeaterHis and CoolerHis controller class.

TRAVAUX EN COURS. LED can do so much more than being on or off.
HeartBeat, Pulsing, ErrorCode and more can be so useful.
Mini projects
 | Page(s) under construction. |
- Tank refill
Pymate Expansion programming


TRAVAUX EN COURS. How to control your 16ADI/16DO expansion. Input/Output/Analog/etc.
PymateIO Expansion Bus

Advanced programming
| Page(s) under construction. |
- About asyncio
- Creating tasks
- Scheduling tasks
References
| Page(s) under construction. |
- PymateIO library
- Helper libraries